
My friend and fellow knifemaker Cliff Fendley and I decided to try our hand at making some denim micarta handle material. This was our first attempt so we knew it would be a learning experience, and it was.
Micarta is a material, or process, developed in the 1950s by Westinghouse. It is basically layers of material bonded together with resins. Different materials can be used including linen, paper, canvas, and denim. The bonding can be done with a variety of epoxy of polyester resins.
After doing some research, we decided to use West Systems 105 epoxy resin and 206 slow hardener. The slow hardener would gives us around 20-30 minutes working time before it set up. There is also an extra slow hardener but our local supplier does not carry it because it requires an additional $20 in hazardous material fees to ship it.
From what we read, the West Systems epoxy seemed to be one of the best available and is commonly used for building boats. It is expensive at $52.00 for a quart from our local supplier. In addition, we bought the $12.55 mini pump system which is calibrated to give the correct 5:1 mix of resin and hardener with equal number of pumps from each can.
We wanted to make a few pieces of denim micarta so we cut our materials. I planned to make a 5x7" piece about 1/2" thick with alternating front and back layers of blue jean denim (lower left). I also planned to do the same thing with black denim (lower right) but we ran out of epoxy before we got that far. Cliff made a 1" thick 5x5" piece from faded blue jean (top pile) and a 1" thick 1x7" piece from alternating layers of tan and black denim which he twisted before pressing..

Our plan was to use Cliff's large welding table and clamp several pieces of plywood extending off of the table so we could clamp a top piece of wood to press the layers while they set.

Having never attempted this before, we planned to pour the epoxy onto a layer, squeegee out the air bubbles and excess epoxy, and then do the next layer. We planned to wrap the whole thing in wax paper to prevent sticking to the wood. We found a couple of old Bondo spatulas to squeeze out the air bubbles.

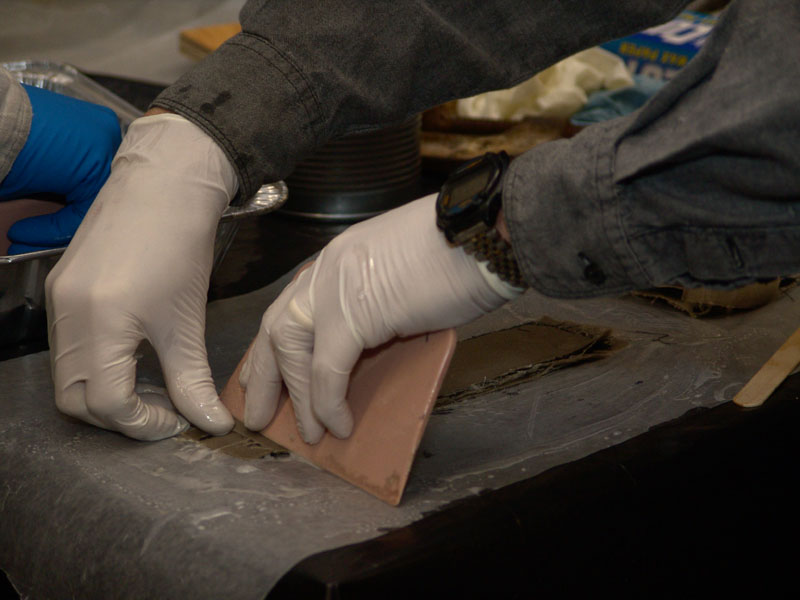
We quickly learned our first lesson. Pouring the epoxy directly onto the material is not an efficient method. We changed to pouring the epoxy into an aluminum baking pan and saturating the layers of material in the pan before putting them onto the wood block. This method allowed me to keep mixing epoxy and pouring it into the pan as needed while cliff saturated the pieces and transferred them to the press block. I would then squeegee each layer as it was put on the block. I would soak up the excess run-off epoxy with the next piece of material to be used and put it into the pan for Cliff.

This assembly line approach worked very well and we were able to quickly and efficiently saturate and stack the layers with very little waste.

We placed another pan under each press to catch drippings. As you can see, there wasn't much waste.

After we had the material saturated and stacked, we folded the wax paper over it and clamped a top piece of plywood to press it. We clamped at four corners and measured the height of each corner as we tightened the clamps to make sure we had uniform thickness across the piece.
Cliff checks a piece and wipes up some overflow.

The thinner stack of blue jean material. This is 18 layers of material giving us about 1/2" thickness.

The thicker stack of faded blue jean material. This was 35 layers material giving us about 1" thickness so it could be split down the middle to get approximately 1/4" handle slabs.

For the longer twisted piece of tan/black denim, Cliff twisted it by hand while I tied a string around it to hold it together. We decided to press this in a mill vice. We sprayed the vise with WD-40 to prevent any overflow epoxy from sticking to it. We put the saturated and tied bundle of material in a plastic freezer bag and put it in the vise.
Sorry, I couldn't take pictures of the twisting and tying operation as all of our epoxy covered hands were busy at the time.
Next lesson learned: When we tightened the vise, the bundle of material wanted to squeeze out the top of the vise. We fixed this problem by clamping another piece of plywood on top.

Everything pressed and setting up.

We were in no particular hurry so we let the pressed micarta set and dry for 4 days before removing it from the presses.
When we removed the materials we found that the flat pieces had stuck to the plywood but it was easily pried off. Some of the wax paper also stuck but we assumed we would grind off the top layers anyway.

I check out my thinner piece of blue jean micarta.

We were now anxious to see what we made so we cut off a piece from the end of the thicker stack of faded blue jean material and gave it a quick sanding and polishing.


After sanding


After a quick buffing

This looks promising.
Next we removed the twisted piece of tan/black micarta from the mill press.


It was easily removed from the freezer bag and this seems to be a much better method than using wax paper. It also kept the vise clean.

Next lesson learned: We should not have allowed knots in the string to be positioned along the flat surface of the micarta. We will have to grind fairly deep to remove the string. Next time we will wrap the string so that any knots are at the ends which will be cut off anyway.

We cut a piece from the end to see what we had made.

We sanded and polished the cut cut of piece.
After sanding. We liked this a lot.

After a quick buffing we like it even more.

I will post pictures of the finished micarta after we have installed it on some knives so check back soon.
Lessons Learned:
This is a two-man operation. It really took both of us to make this work as you have a short working time before the epoxy starts to set.
Soaking the layers of material in a pan and then squeezing out the excess and air bubbles works much better and more efficiently than trying to pour the epoxy directly onto the material.
Plastic freezer bags work much better than wax paper for wrapping the wet micarta.
If tying up a twisted stack of material, make sure any knots in the string are at the ends where they will be cut off.
The mill press worked great for a long narrow piece like would be used for a one-piece handle.
This is an expensive process. Using the West Systems epoxy we invested $68.00 in a quart of epoxy and the pumps. The pumps are supposed to be reusable and I'm sure we can get a better epoxy price by buying in larger quantities but it is still expensive. Add to that 10 man-hours to make enough micarta to make 5-6 knife handles.
Our conclusion is if you want common micarta, it is not cost efficient to make it yourself. You can buy large pieces for about $25 or a pair of handle slabs for around $12 from several sources. Considering the time and expense we encountered with making it, buying it makes more sense. The exception of course is if you want to make something unique that is not readily available elsewhere such as blue jean micarta or a unique twist pattern.
I know there is less expensive epoxy and polyester resins available and they are often used in making micarta. Since this was our first experience in making micarta, we cannot compare products. We may try using some other resins in the future to compare. I can say the micarta we made with the West Systems epoxy looks great and appears to be extremely tough. It dried crystal clear and we were impressed with how tough it was when we beat the heck out of a scrap piece with a hammer. It cuts, sands, and polishes very well.
Here is some of my Blue Jean material on a couple of my Rio Grande bush knives.

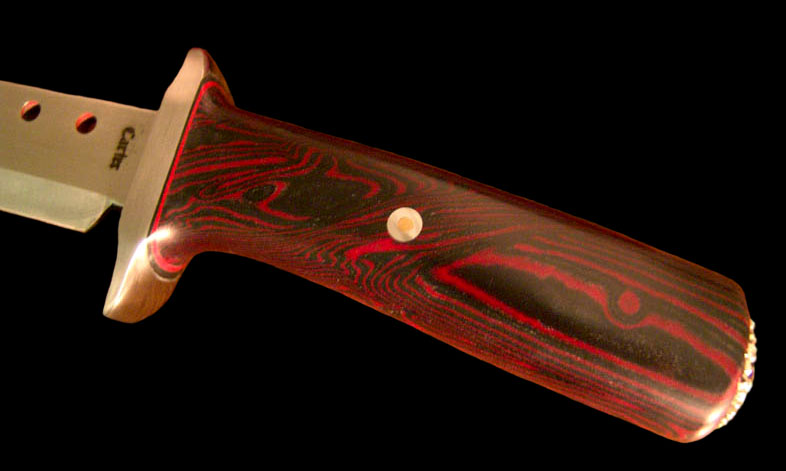
I make a black and red twist handle


And here is how it looks on the knife
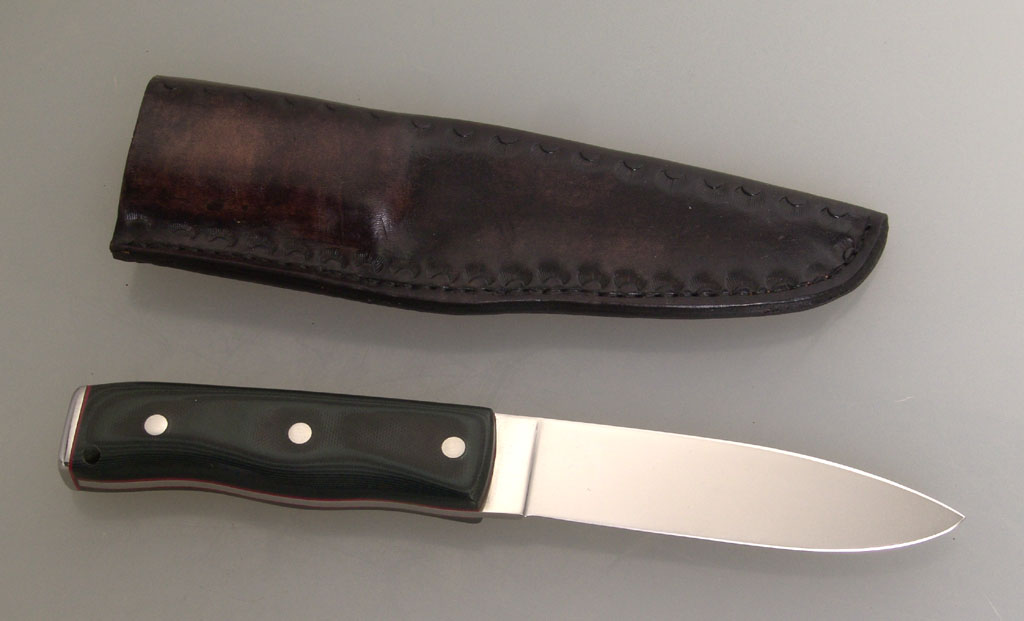
Here is the finished product on a couple of Cliff Fendley's "Blackhawk" knives.
Blue Jean Micarta

Black/Gray Twist Micarta

How tough is this stuff? Almost unbelievably tough. See our destruction testing on Cliff's website at http://www.fendleyknives.com/LM105_tough.htm