
Now we are down to the handle. We can go to the handle layer, and then the handle path, and just create a rectangular path that fits our handle and then fill it like did with our guard and blade. Using "Filters" you can add textures or you could draw in grain patterns with the paintbrush. I am going to show you another trick to make a realistic drawing and a way you could show a customer exactly what they will be getting.
First, lets make our "Handle" layer the active layer and the go to "Paths" and click the "Handle" path to make it the active path. To make things easy, turn the grid back on.
Now we could draw the handle path using the "Pen Tool" and that would be easy enough especially with the help of the grid. But there is an even easier way, or at least another way.
Remember when we used the "Ellipse Tool" to make our pin holes in the handle? Well, there is another tool in that same group called the "Rectangle Tool". Select the "Rectangle Tool" and then left click and hold at the upper left corner of the handle. While stilling hold down the left mouse button, drag your mouse down and to the right. You will see a rectangle form as you do this. Drag it down to the lower right corner of the handle and release the mouse button. If you miss your target just choose "Undo" from the "Edit" menu and try again (or use the keyboard shortcut of Crtl+z to undo).
Now click the "Load path as a selection" button at the bottom of the "Paths" tool box to highlight your new handle path. Now instead of filling the path with a color or gradient, I am going to show you a neat trick.
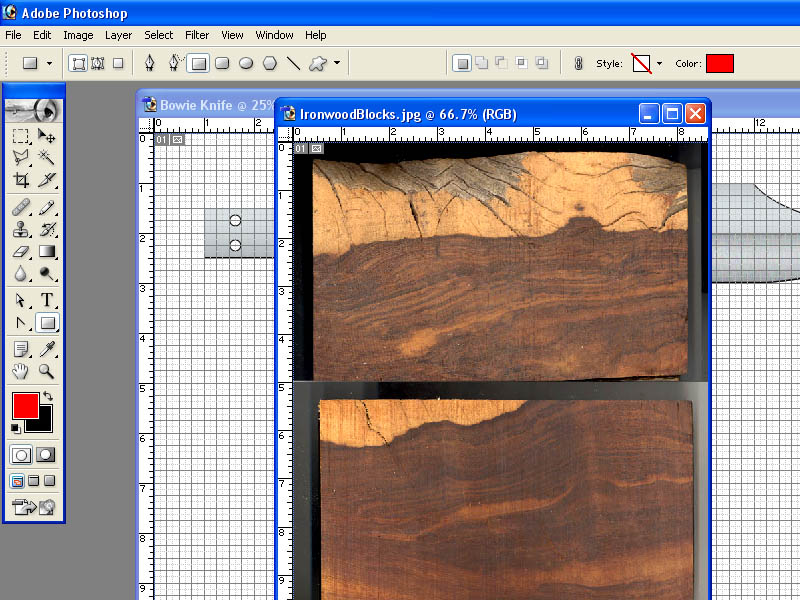
I have a picture of some ironwood. I will open that picture in Photoshop (yes, you can have multiple pictures and project open at once in Photoshop). I can either use the "File", "Open" command from the menu or I can locate my picture in Windows Explorer, right click on it and choose to open it with Photoshop.
Here is my picture of the ironwood. Notice that my Bowie Knife drawing is still open behind it.
I am going to use the "Rectangular Marquee Tool" from the toolbox at the left to copy a portion of this photograph into my Bowie Knife drawing.
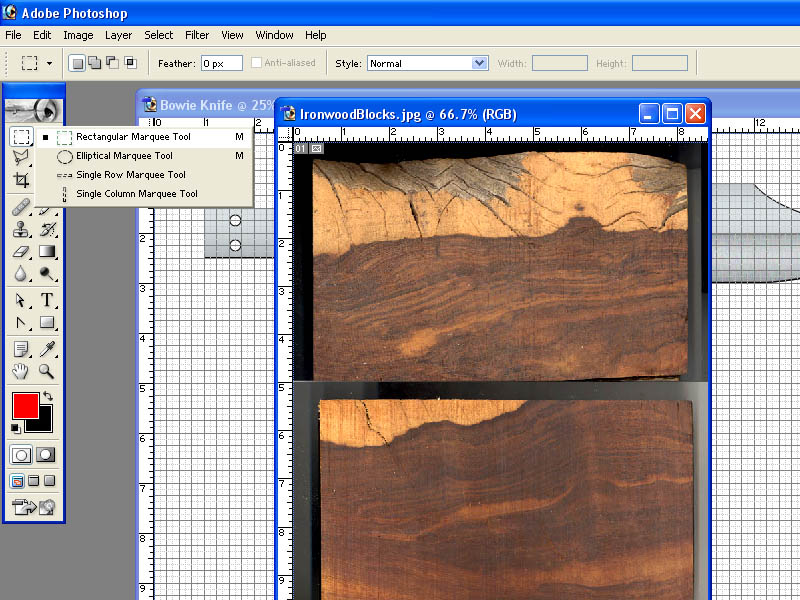
Using the "Rectangular Marquee Tool", I am going to left click hold and drag a rectangle around the portion of the picture that I want to copy.
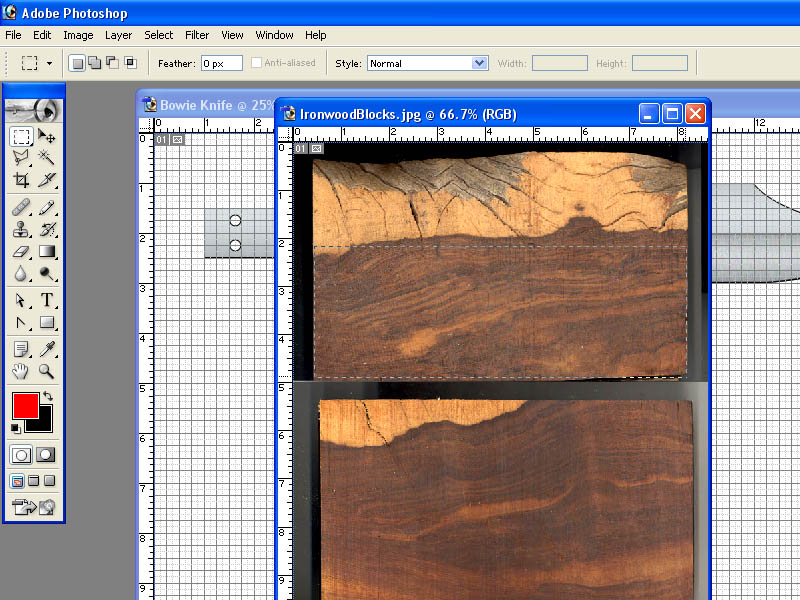
Now, I select "Edit", "Copy" from the "Edit menu (or I could use the keyboard shortcut of Crtl+c).
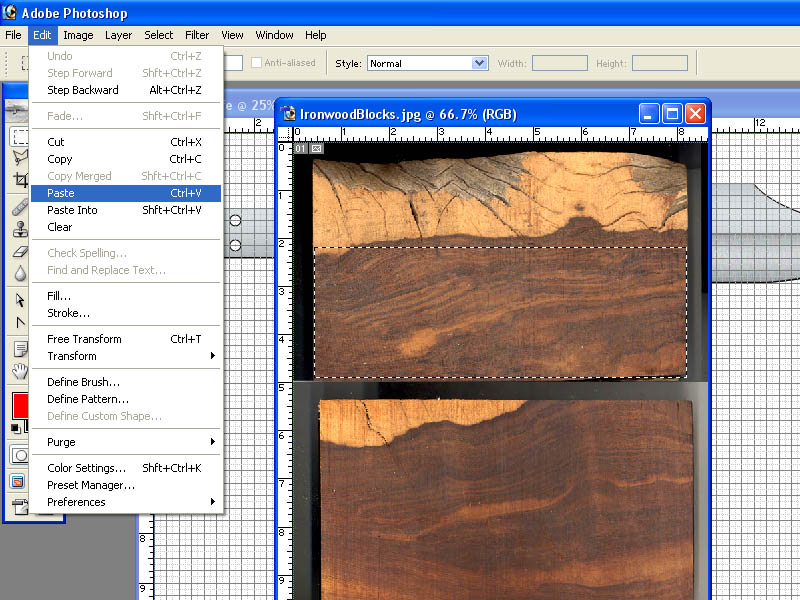
Now I click the Bowie Knife picture in the background which will bring it back to the front just the way I left it with the handle path active and highlighted.
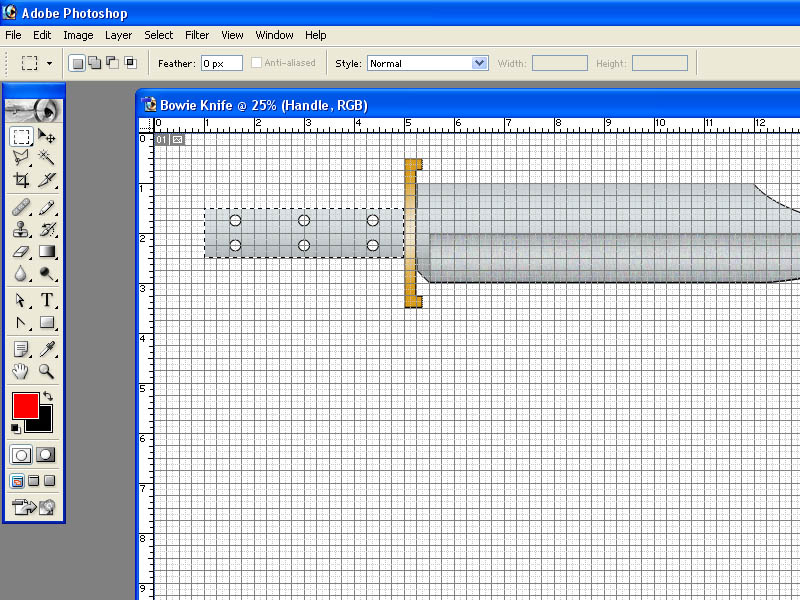
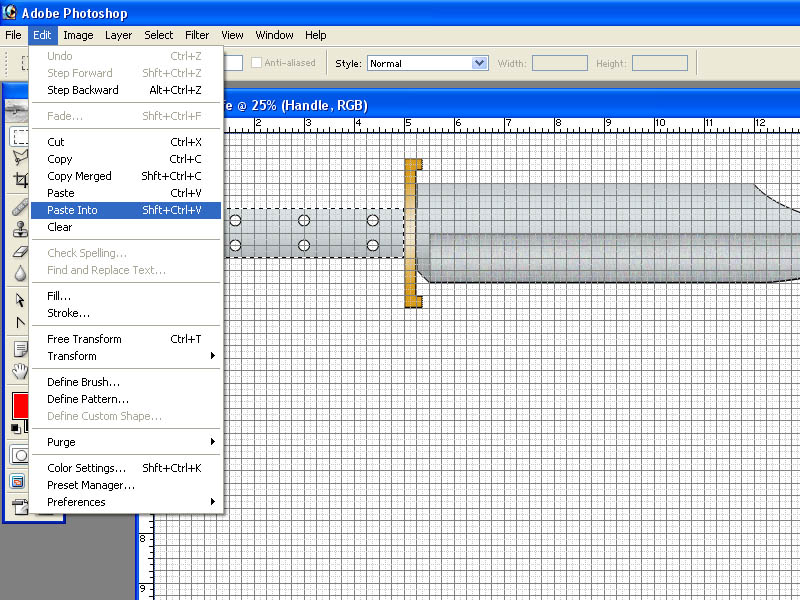
Now I choose "Paste Into" from the "Edit" menu and the portion of the ironwood photo that I copied is pasted into the handle path.
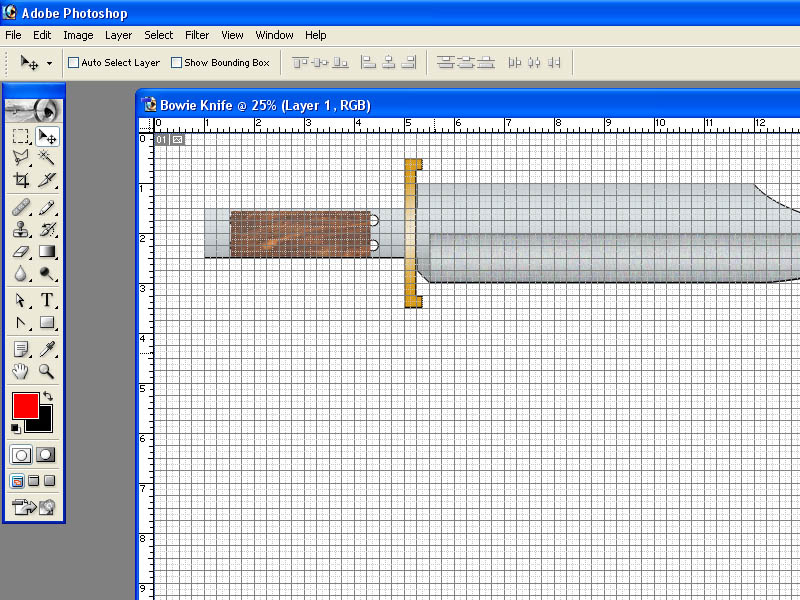
I can use the "Move Tool" to move it around but it will only be visible within the handle path because I used the "Paste Into" command instead of "Paste". But we have a problem. The ironwood is too small to fill the handle path no matter how I move around.
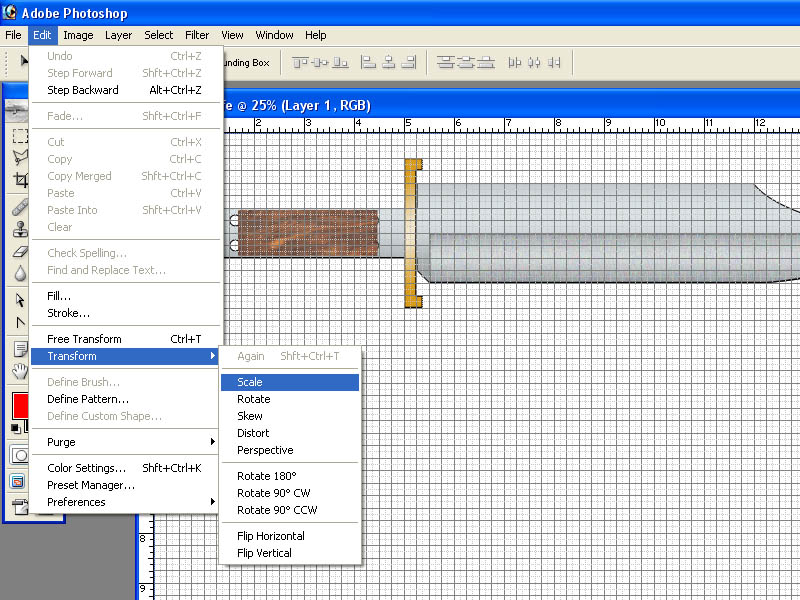
No problem at all. I will just make the ironwood bigger to fit. I choose "Transform" and "Scale" from the "Edit" menu.
I click the "Maintain Aspect Ratio" button so that the image enlarges evenly both horizontally and vertically.
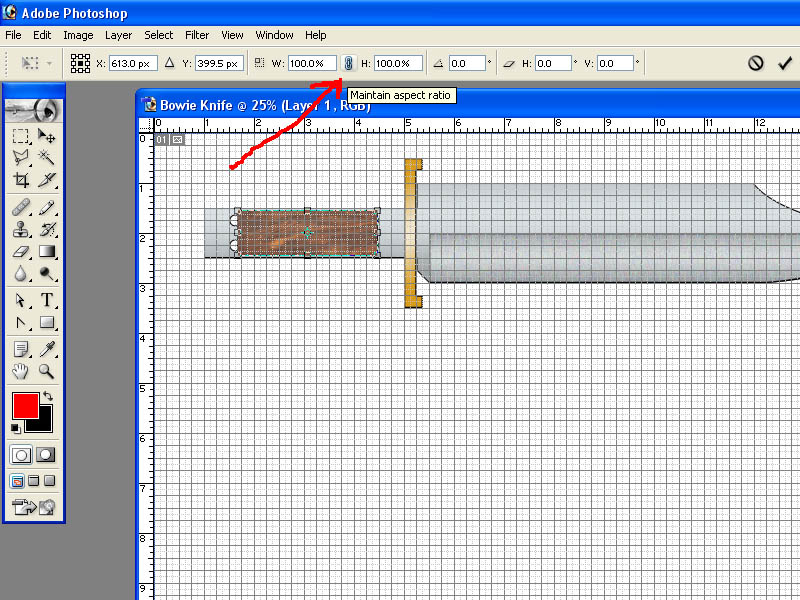
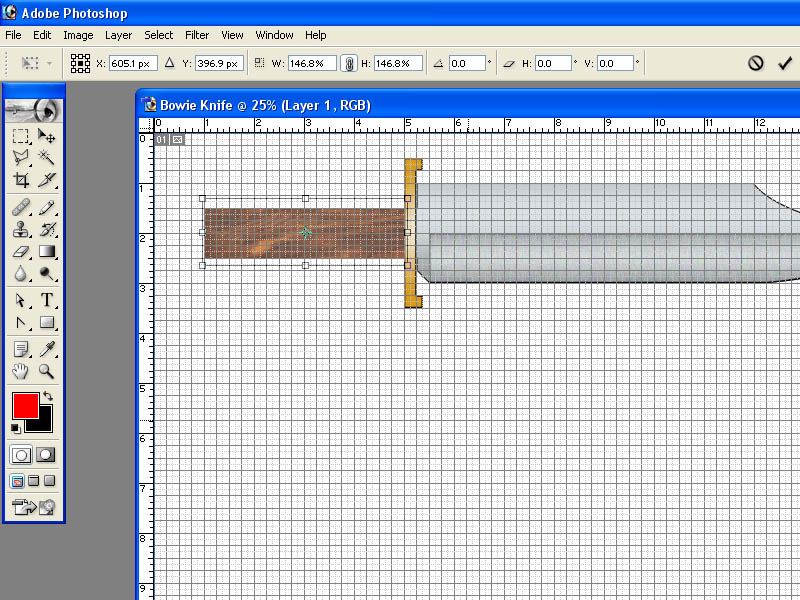
Now I just drag the corners of the image to the size I want.
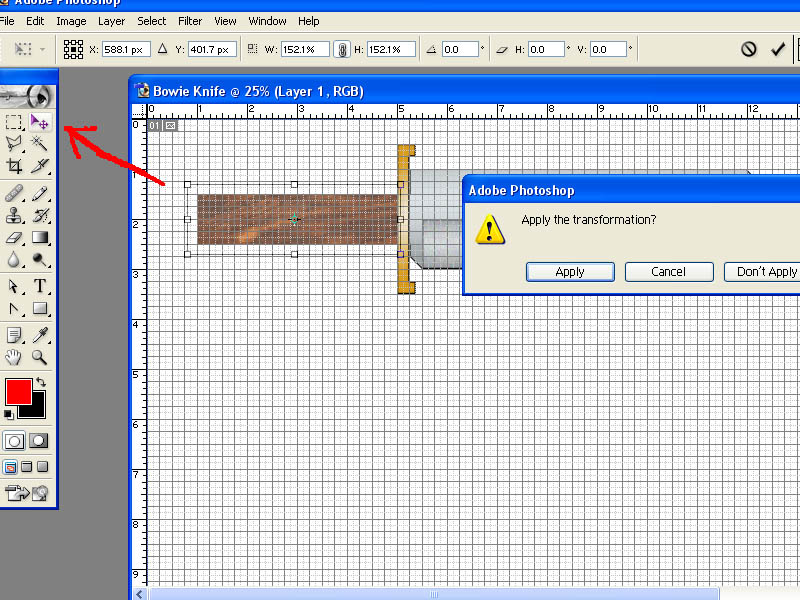
When I get it to the size I want, I click the "Move" button and this opens a window asking if I want to apply the transformation I just made. In other words, do I want to keep the changes. I do, so I click "Apply".
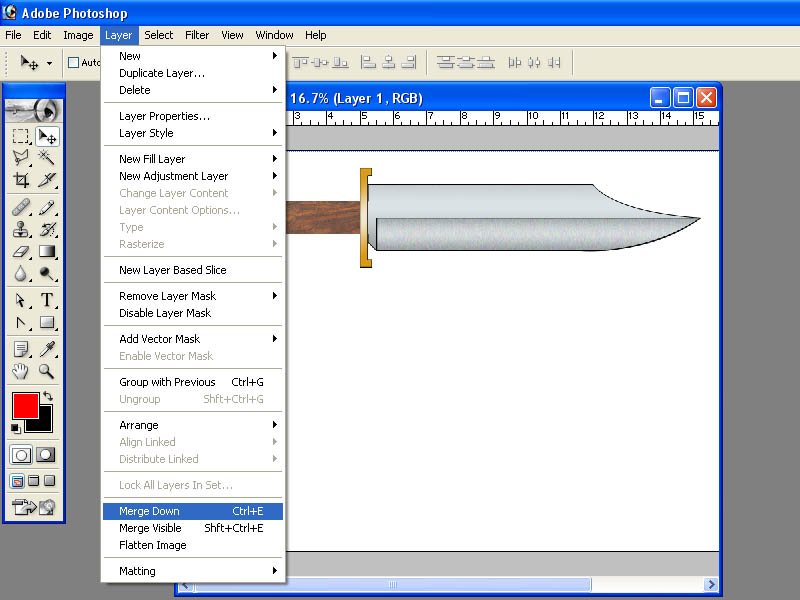
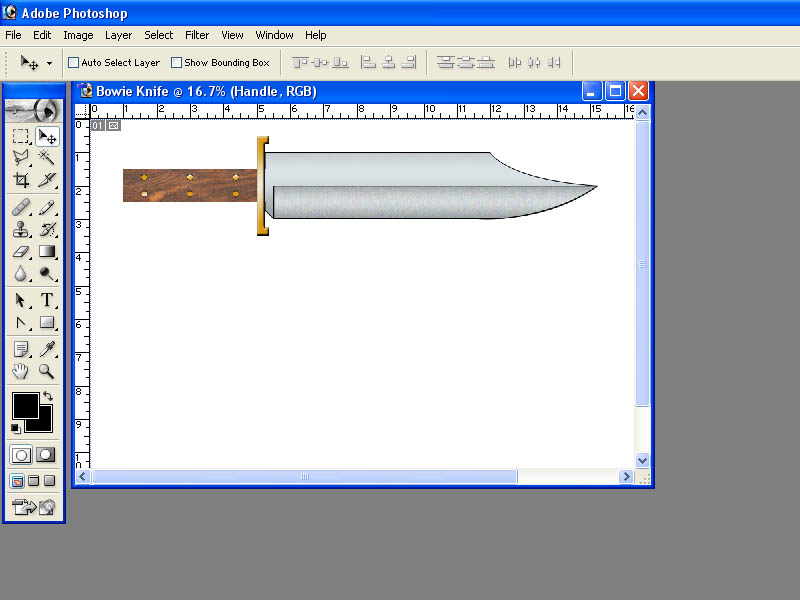
Now our Bowie has a nice ironwood handle. Because of the way I did this, using the "paste Into" command, the program added a new layer above the handle layer. The new layer contains the pasted image.

I could just delete the original "handle" layer and rename the new layer "handle". Instead, since the new layer is right above the original handle layer, I can just chose "Merge Down" from the "Layer" menu and it combines the new layer with the layer under it.
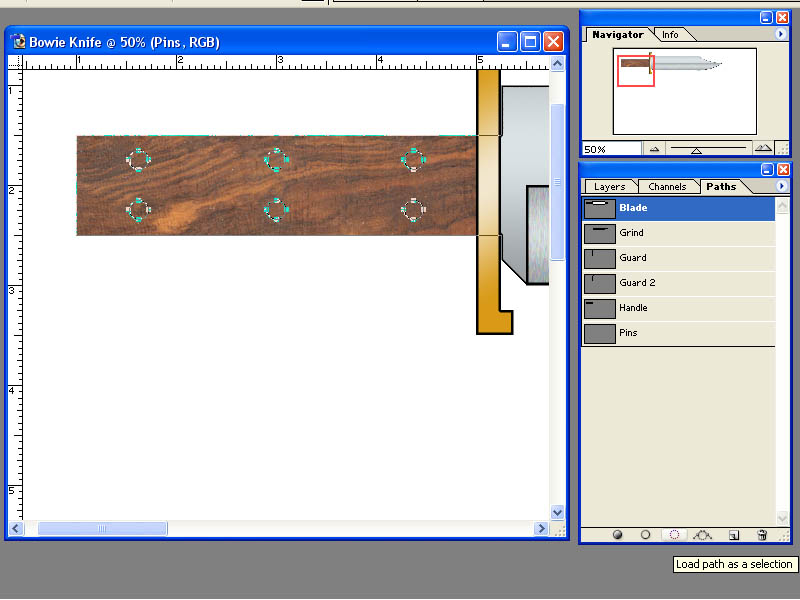
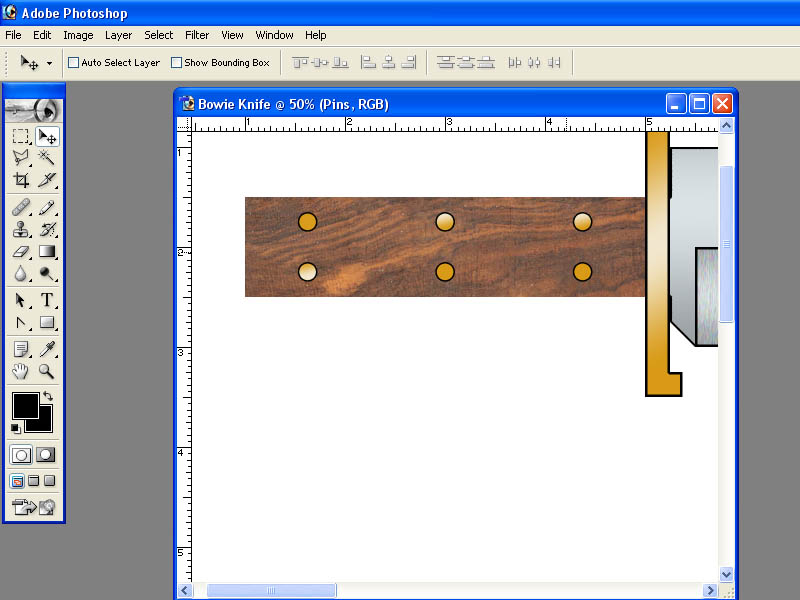
We are on the home stretch now. All we need are some handle pins. This job is already halfway done for us. Remember when we made the holes on the blade to the pins? Well, those holes are going to be exactly the size we need and in the correct location for our pins. We can use those same circle paths that we used for the holes to make our pins.
Click the "Pins" layer to make it the active layer.

Now click the "Paths" tab.
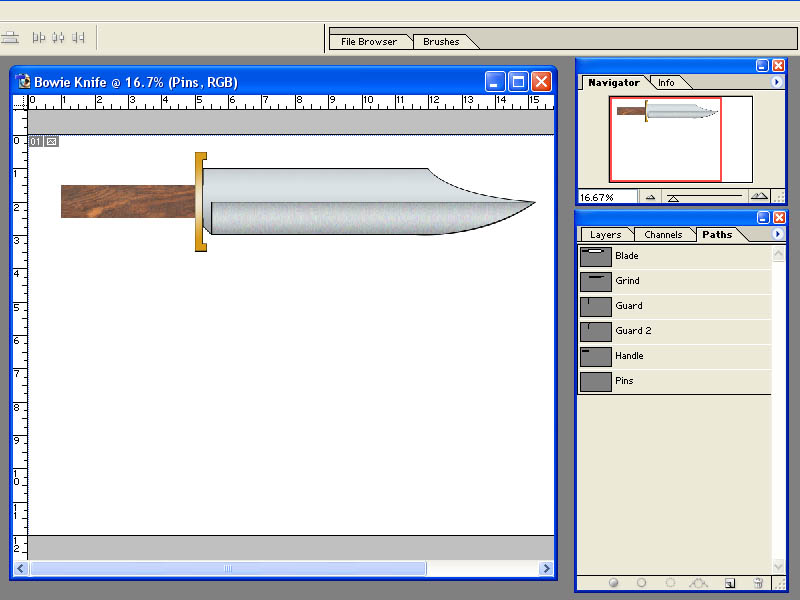
We are not going to choose the "Pins" path in this case. We don't need to draw the pins in the "Pins" path since we already have what we need in the "Blade" path. It is important to remember that whatever we draw here will be drawn into the active layer we selected, in this case the "Pins" layer, regardless of which path we use to draw it.
So I am going to click the "Blade" path.
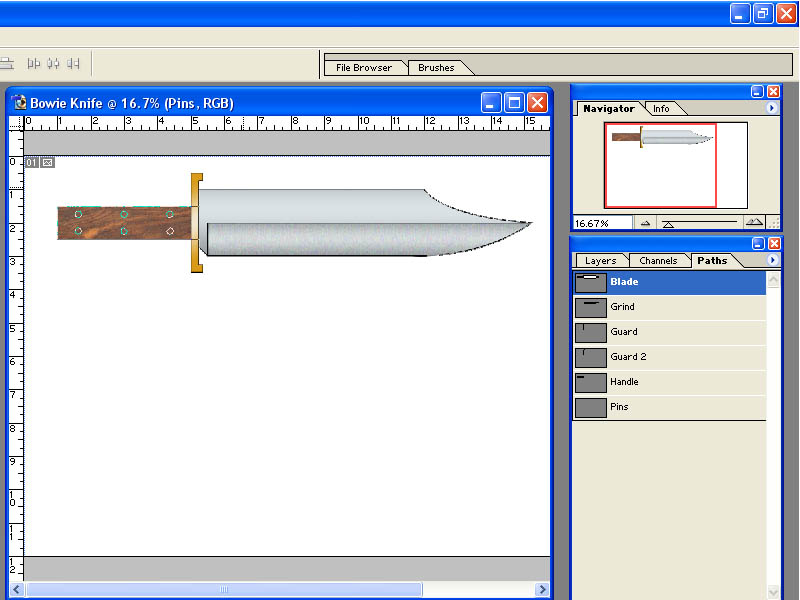
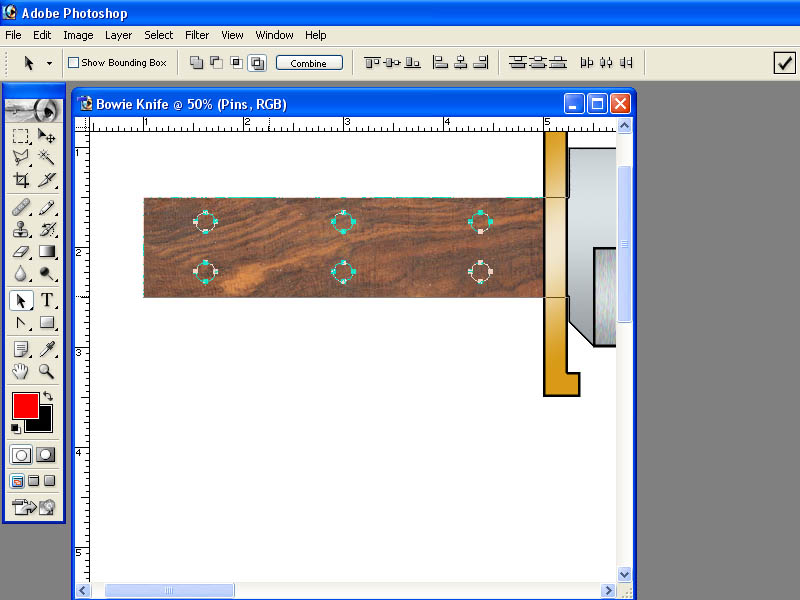
We can see our pins holes in the "Blade" path right where we need our pins in the handle. I need to highlight just the circles for the pins and not the whole blade path.
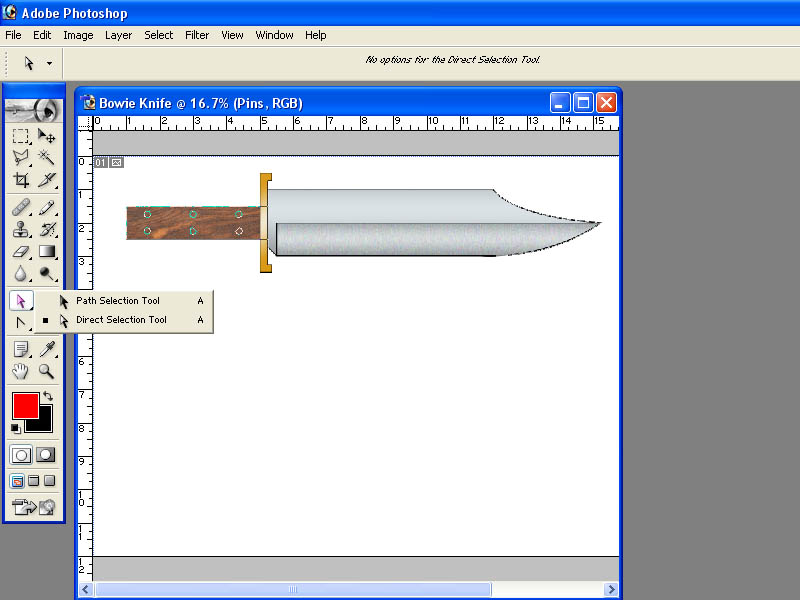
I am going to use the "Path Selection Tool".
I left click on the first hole and you see that is selected by the four squares around it.

While holding down the SHIFT key on my keyboard, I click the other 5 holes. Now I have all 6 holes selected.
Now I click the "Load path as a selection" button at the bottom of the "Paths" tool box. You will see all 6 holes become active with little hash marks around them.
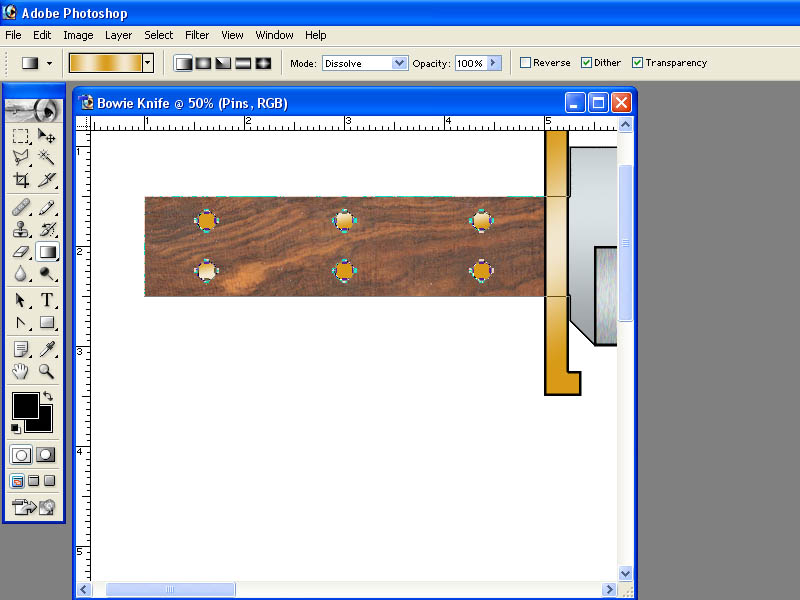
Now we are going to fill all 6 hole paths simultaneously using the "Gradient Tool" Since we already have a brass gradient created that we used for the guard, we can use it to make some brass pins.

I left click hold and drag the pointer just a shot distance at a slight angle.

And we have filled all of the holes with the brass gradient. You could do this to each hole path individually but this usually works just as well and faster.
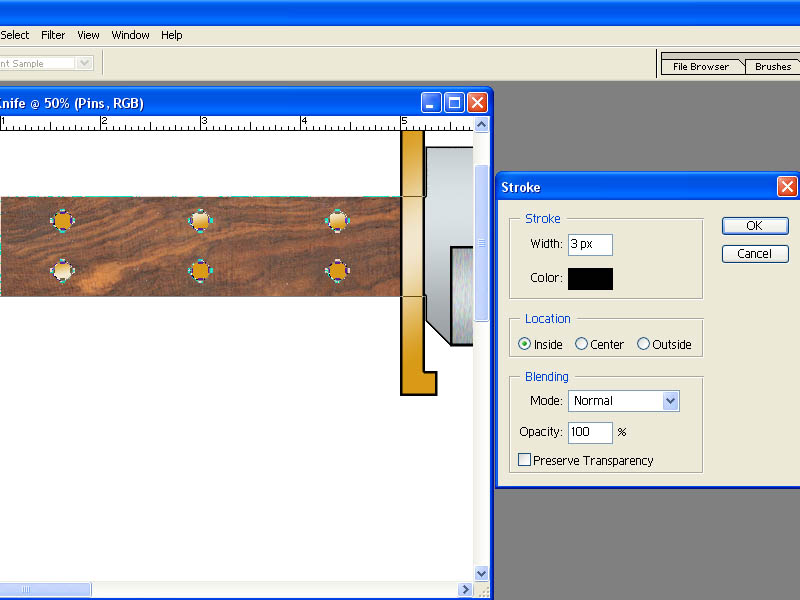
Let's do one more thing while we have the hole paths highlighted. Lets stroke them with a black outline to make them show up a little better. Choose "Stroke" from the "Edit" menu.
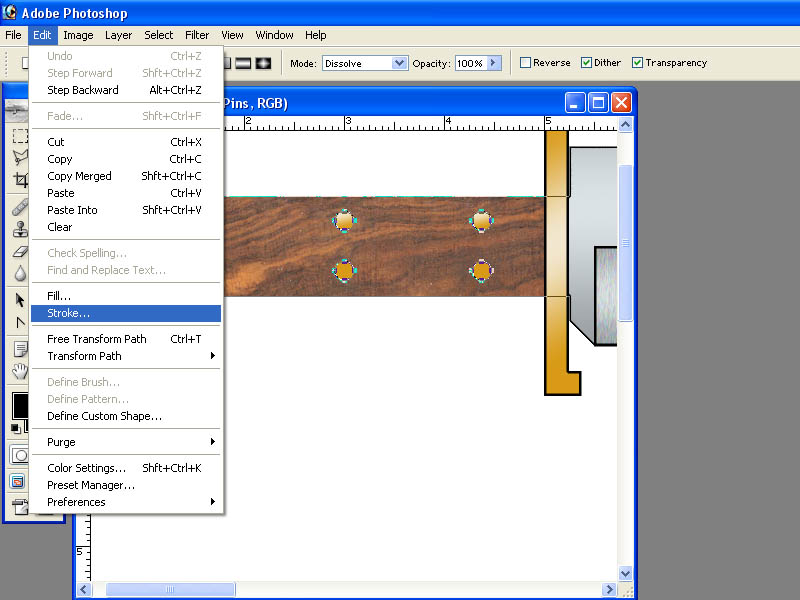
When the "Stroke" window opens, set the width to 3 px and the color to black. Click OK.
Now DESELECT your paths and we now have pins drawn into the "Pins" layer.
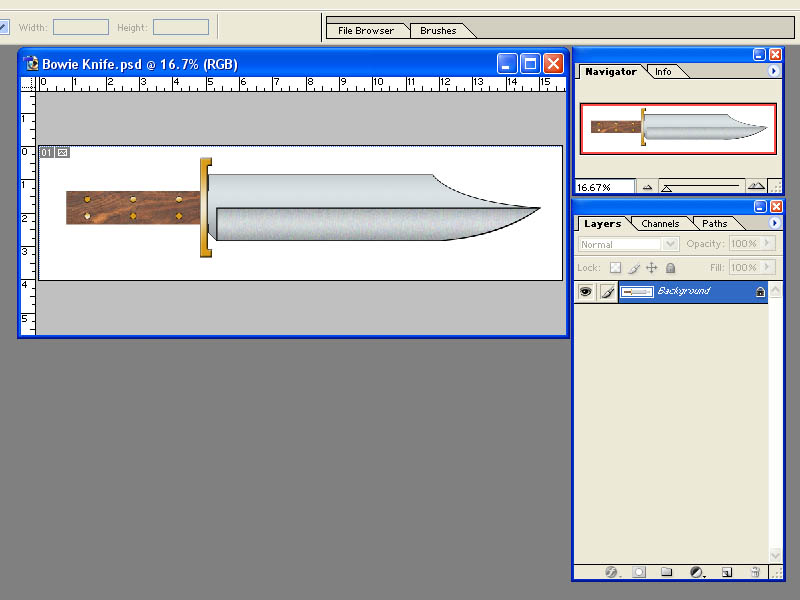
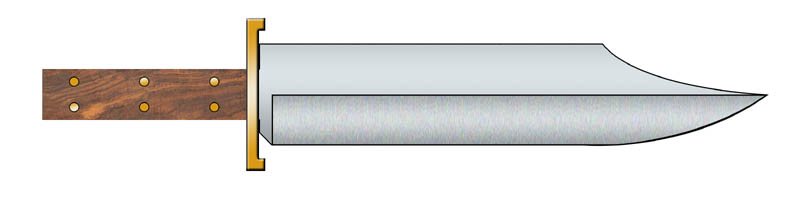
And here is our Bowie knife (below). Looking at it now, I see the handle should be raised. It wouldn't be hard to do by erasing blade in the "Blade" layer (or just creating an new "Blade" layer) and then designing the handle in the Blade "Path". You can move the handle and pins up to the new location in their respective layers.
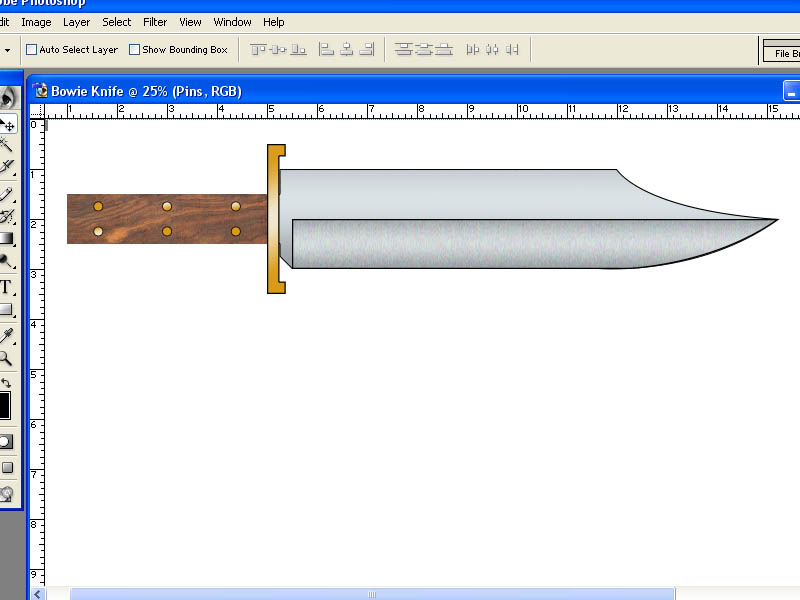
I am not going to go back and change the handle in this tutorial. I have shown you enough to do it if you want to. That's part of the power of designing knives in a program like Photoshop. You can get a better idea of what it will look like and change it around until you get what you want (or your customer wants).
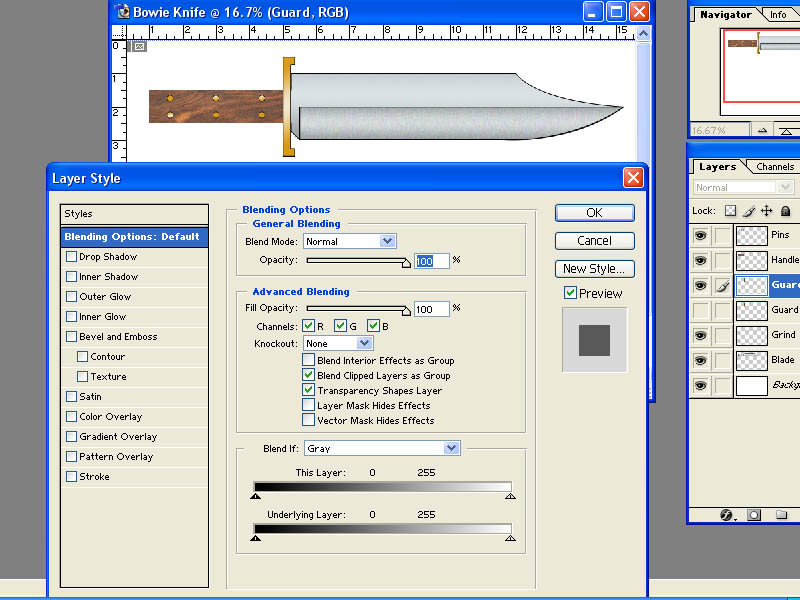
There are lots of other little tweaks and details we could do. For example, the guard looks a little flat. Under "Layers", right click on the "Guard" layer and choose "Blending Options".

The "Layer Style" window will open with lots of options that can be applied to the layer.
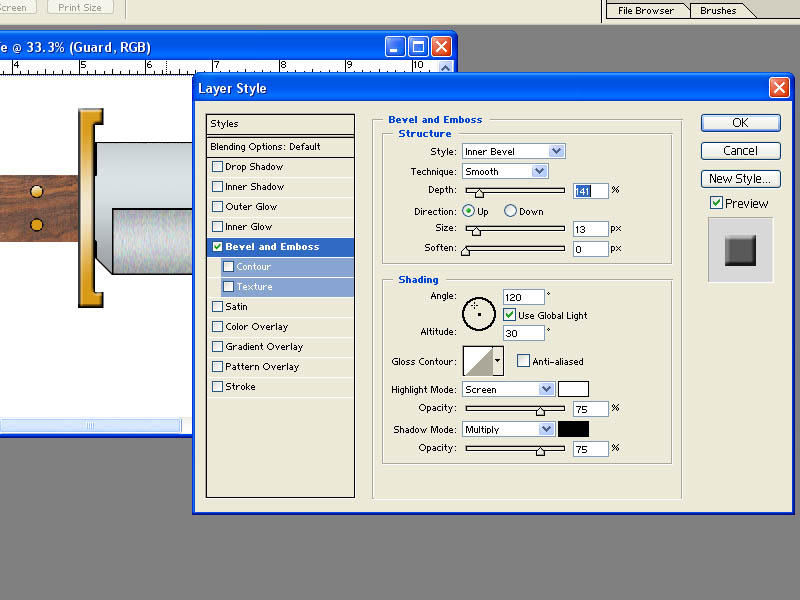
Let's click on "Bevel and Emboss" and set the Style to "Inner Bevel". Set the "Depth" and "Size" as shown below. Click "OK". This adds just a little bevel to the edges of the guard giving it a little depth and a more 3 dimensional look. You can do the same thing to the handle if you like to make it look more rounded.
That's all we are going to do with this Bowie knife. Although this might seem like a long journey, this is really a relatively simple design and pretty quick and simple drawing. I would normally do quite a bit more detail work but the purpose here was not really to draw a perfect rendering but rather to show you the basic tools you need to design a knife in Photoshop.
If you were doing this to show a customer you would probably want to spend a little more time on making it pretty or more realistic looking with shading and shadows. All the tools you need to do it are in Photoshop but this tutorial would never end if I tried to show you everything you can do in Photoshop.
Remember, we drew this knife full size. You could print it out and have full scale prints that could be cut out and used as templates for making the real knife.
For example, if you just want a template for cutting your blade from bar stock, just turn off all of the layers except the blade and the grind.

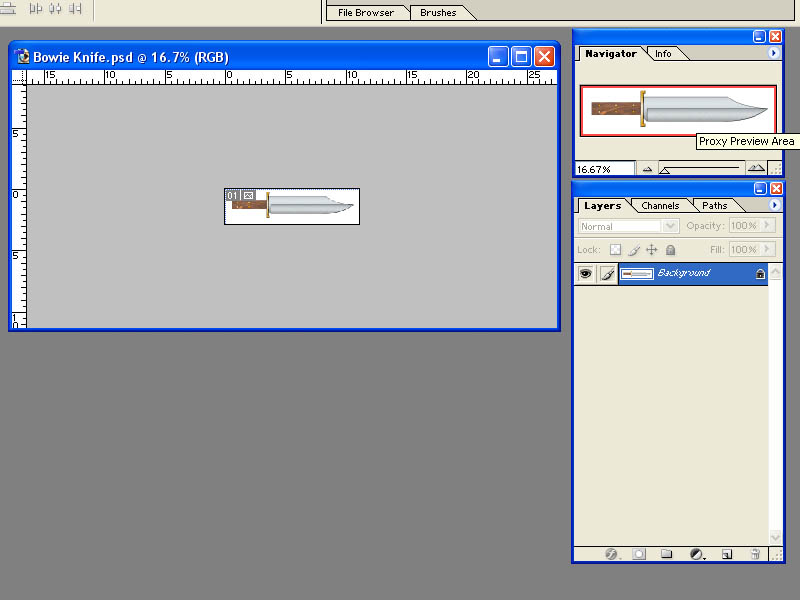
We already covered how to "Save" and "Save As". This Photoshop (.PSD) file is a whopping 5.82 MB (megabyte) file. Even if you save this drawing as a JPEG image it is still going to be a VERY big file because it is a big (20"x 12") or 4000 x 2400 pixel high resolution (200 DPI) image that takes up almost 1 MB of data. That's a great reduction is file size compared to the Photoshop file but it's still too big to email or use on a website. It would take forever to send by email or down load from a website.
If you wanted to email this image to someone or post a copy on a website you would want to reduce the size and resolution.
I will show you how to do it and make a much smaller file while still providing a good picture. There are several things we can do to reduce size.
NOTE: Save your original Photoshop file first if you want to keep it. If you save a copy as a reduced image, use the "Save As" command and save with with a different name. This was explained earlier in this tutorial.
First, we have a lot of blank white space around the knife that we don't need so let's get rid of it.

Use the "Rectangular Marquee Tool" at the top left of the toolbox on the left. Left click and hold and drag you mouse to draw a box around the knife as shown below.

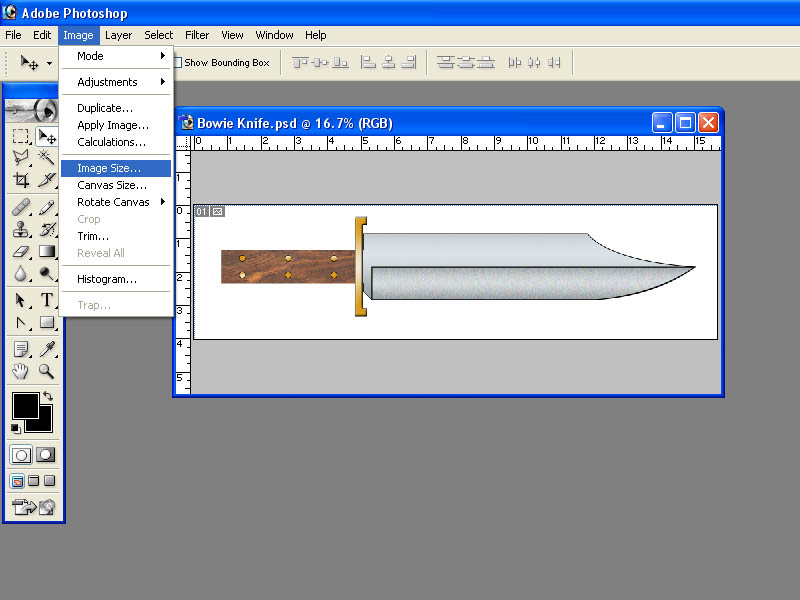
Now choose "Image" and "Crop" from the "Image" menu at the top of the screen.
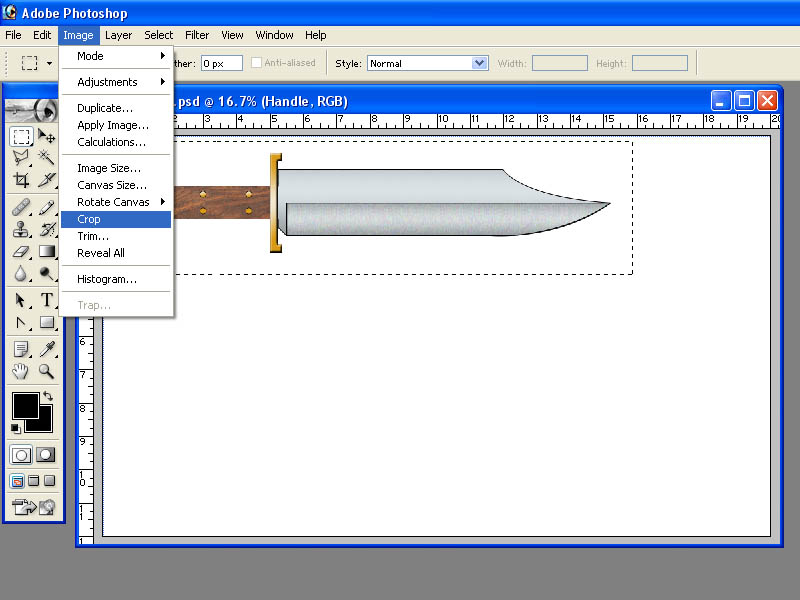
Now you see that we have "cropped" the picture to just the area we had boxed with the "Rectangular Marquee Tool".

Since we are going to save this as a JPEG image and we have already saved our original Photoshop file for future use, we don't need all of these layers anymore and they just eat up data space to define all those layers. Choose "Flatten Image" from the "Layer" menu.
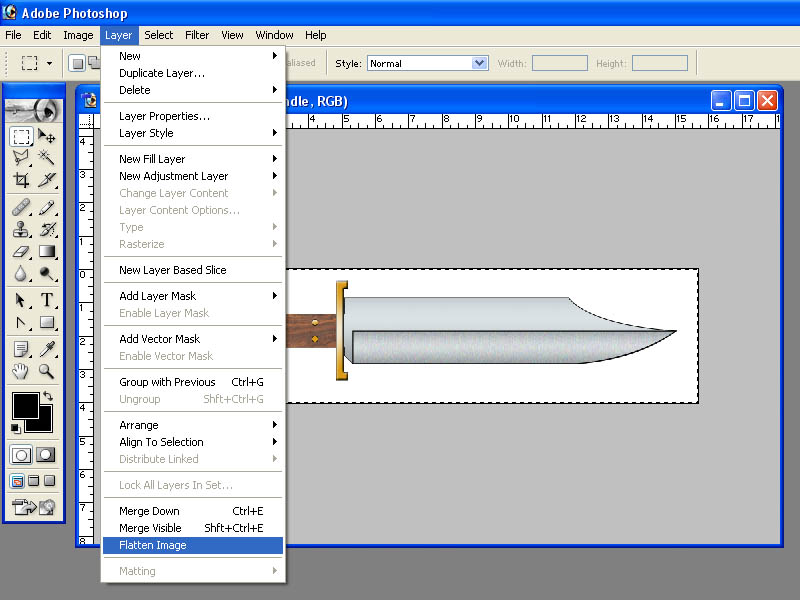
A warning window will appear asking if you want to discard hidden layers. Click "OK"
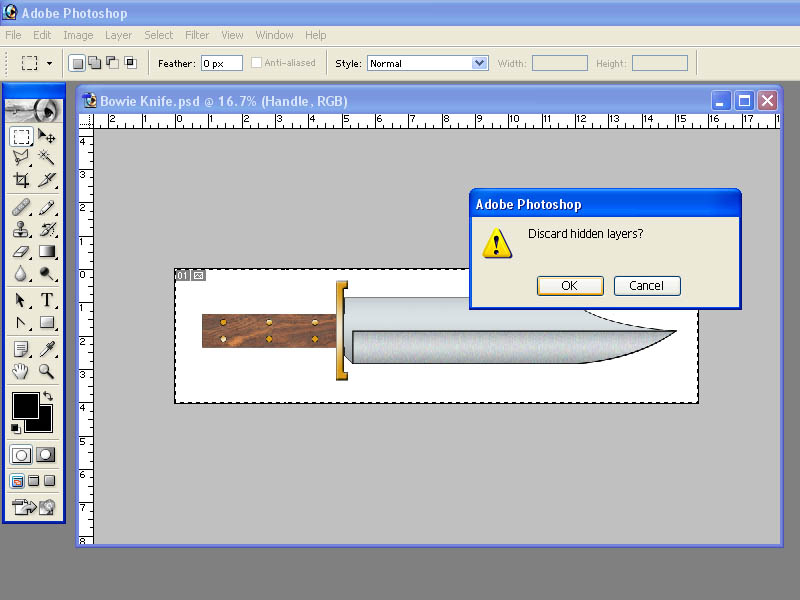
Notice that our "Layers" box now contains only one layer named "Background". All of the layers have been combined into one layer.
Now let's reduce the image size and resolution. From the "Image" menu, select "Image Size".
This will open the "Image Size" window/ Notice the current size of the image after we cropped it. Yours may be slightly different depending on how closely you cropped the image earlier but in this example it is 3138 pixels wide and 200 pixels per inch resolution or the equivalent of 15.69 inches wide at that resolution.
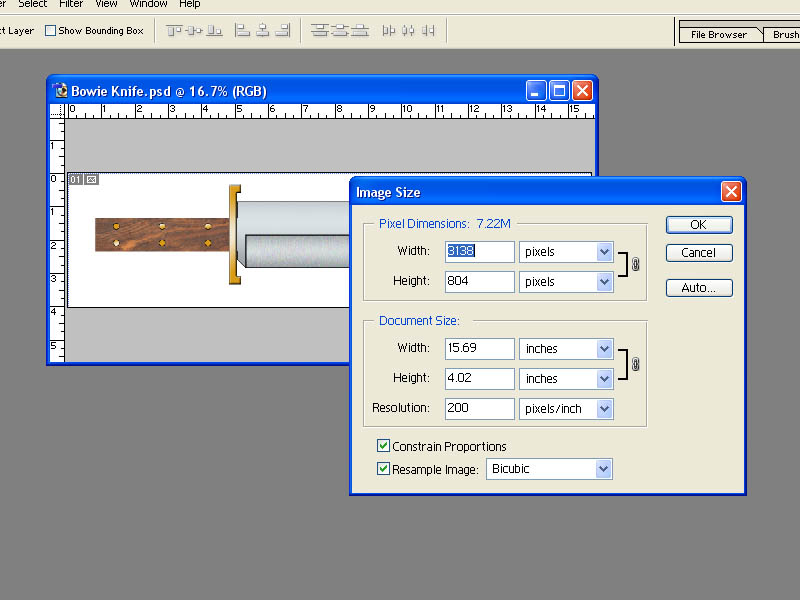
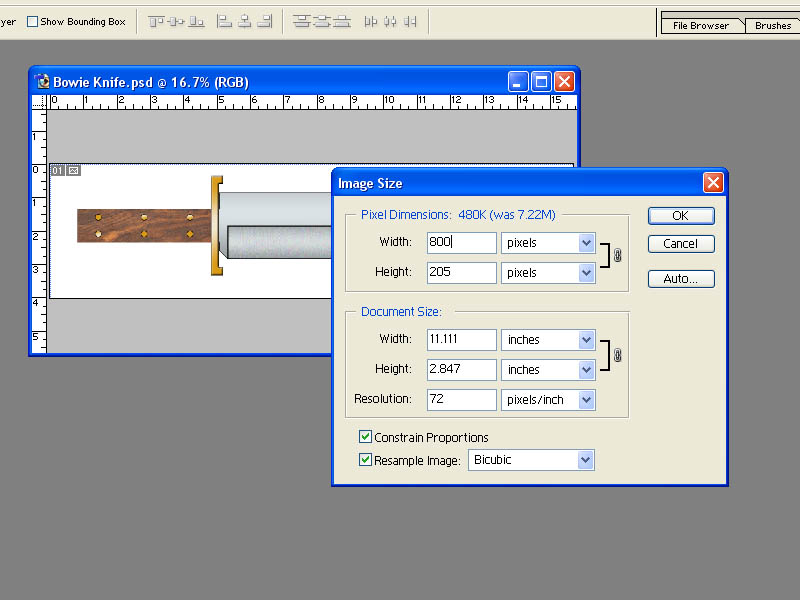
It is important to do this in the order I tell you. First, make sure the "Constrain Proportions" box is checked and the "Resample Image" box is checked and set to "Bicubic". Next, change the Resolution by typing 72 into the "Resolution" box. Now, type 800 into the "Width" box under "Pixel Dimensions" and "pixels" should be in the box net to it. Notice that the Height automatically changes when you change the width. Also notice the size in inches also automatically changed. Click "OK".
Your picture will now appear much smaller on the screen but notice that it is not showing at 100% size. If you look at the "Navigator" box it is at 16.67% of full size in this example. you can use the Navigator to enlarge it if you wish but it is just the display size and has no affect on the file size.
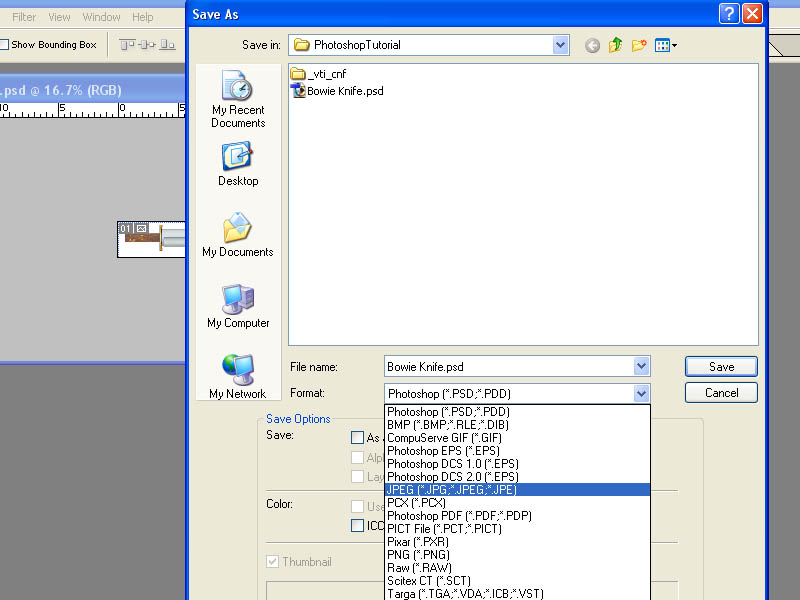
Now that we have reduced the image, we need to save a copy as a JPEG file. Go to the "File" menu at the top of the screen and choose "Save As". Choose a folder on your computer to save the file in with the "Save In" box. Give a new name or a variation of the name you used before and choose JPEG as the format. Click "Save".
When the "JPEG Options" box appears, set the quality to 7 and click "OK".
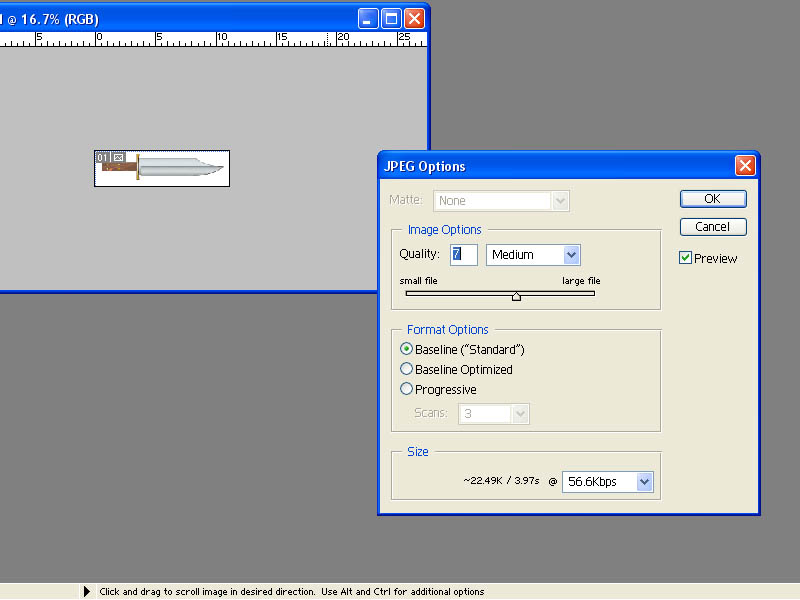
We just reduced the image file from a size of almost 6 million bytes of data down to 26 thousand bytes (26.2 KB). That's about 0.5% of it's original size.
As you can see, the image still looks good at 800 pixels wide here on the this website even at JPEG quality 7.
Well, that's about it for this tutorial. We designed a knife with individual parts in separate layers. We covered a lot of functions and tools that Photoshop has to offer. Believe me, we only scratched the surface of Photoshop but we covered the tools you need to design a knife. Photoshop can do so much more.
The knife we drew was pretty simple but my purpose here was not really to design a knife, but to show you the tools you need to design a knife.
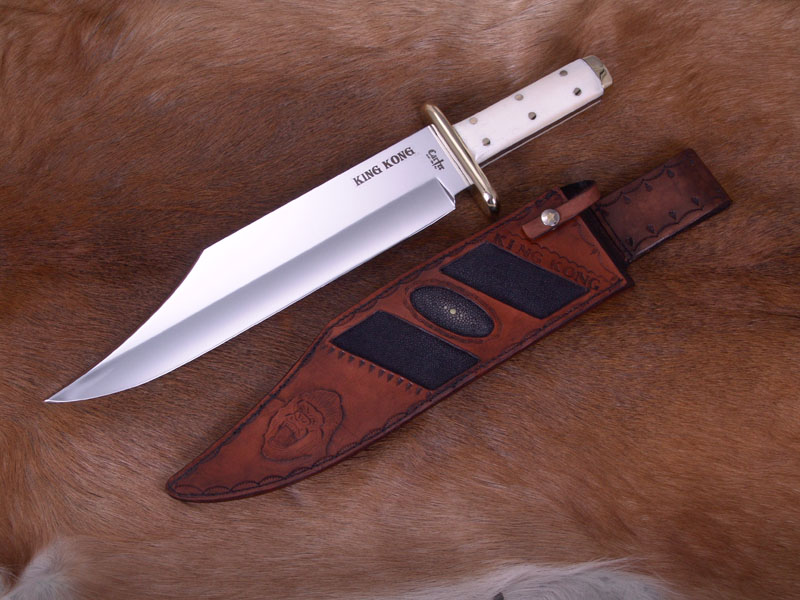
You can get much more detailed as I did in the image below for a custom order order.
.jpg)
When my customer approved this design, I made the real thing using the drawing as a guide and template.
In case you are wondering, I am not connected to Photoshop or Adobe in any way. I don't sell the program and I am not paid to promote the product. I just think it is a fantastic tool and probably one of the best software packages ever created. It's no wonder it is THE choice for professional photographers and graphic artists.
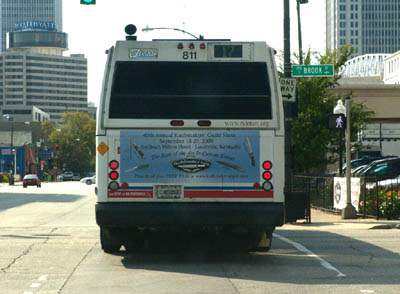
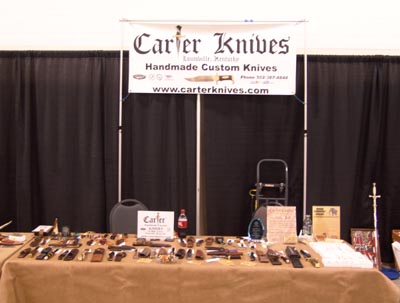
I use the program in my photography all the time. I used it to design my business cards, company hats and t-shirts. I even made the banner that I fly over my table at knife shows with it. I have created ads for magazines, flyers and even designed huge banners that were used on the sides of city buses to promote the Knifemakers Guild Show. I use it to create images for websites and, of course, design my knives. Once you learn to use it, you will find hundreds of uses for Photoshop.
I hope this tutorial has helped you. Please check out my knives at www.cartercrafts.com , nearly every one was designed in Photoshop.
Thanks for your time.
Mike Carter.