
I learned the craft of knifemaking from master knifemaker Gil Hibben so I use the methods that he taught me. That is not to say that my knives will all look like Gil's knives but we do have very similar tastes in styles. I did start out using some of Gil's designs before developing my own style.
Even a "simple" fixed blade knife may take as many as 29 separate steps to create.
Design the knife on paper or a computer model
Layout the design on steel bar stock
Cut the blade blank form the steel bar stock with a steel cutting bandsaw
Smooth the edges and refine the profile with a disc grinder
Surface grind the sides to remove scale
Mark the center lines for the cutting edge
Coat the blade blank with machinists dye and mark the grind lines
Rough grind the blade
Mark and drill holes for the handle pins
If applicable, drill and tap or cut a receiving hole for a butt cap
Heat treat the blade to harden
Temper the blade, usually twice
Surface grind 2nd time to remove scale and flatten blade
Finish grind the blade
Sand and/or polish the finish of the blade
Mill the guard, bolsters, and/or butt cap as applicable
Sand or polish the guard, butt cap and/or bolsters
Solder the guard or bolsters in place
Cut and shape the handle material
Cut pins to attach the handle
Attach the handle
Attach the butt cap if applicable
Peen and grind the handle pins flush to the handle
Sand and finish the handle.
Make the sheath and coat with water protection
Final finish and polish the entire knife
Hone the cutting edge
Coat the knife with a coat of Renaissance Wax
Photograph, package and ship.
Folding knives and more complex models may require much more and sometime take weeks to finish. Here is a brief overview of how I make a knife.
Here, I start
the knifemaking process with a piece of annealed 440C stainless steel bar stock.
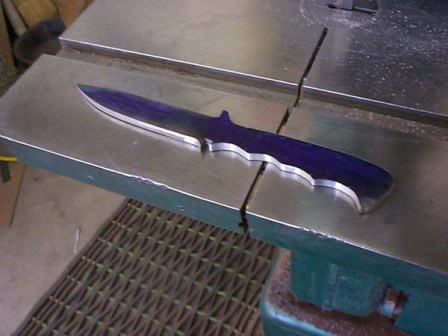
I coat the
blade with a blue dye so I can scribe lines in the dye to make a pattern to
follow while cutting out the rough shape of the knife.

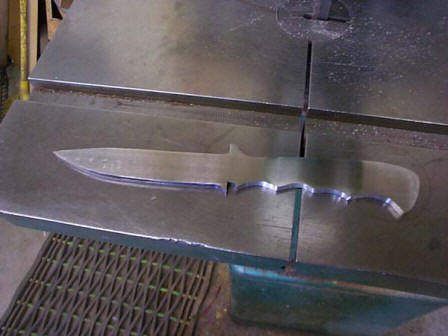
Next, I use
disc grinders and belt grinders to clean up the rough edges and complete the
profile of the knife. This will be a little boot knife based on a Gil Hibben
design.
Now I grind
the sides of the knife perfectly flat and remove any surface scale and pits.
I then
"rough" grind the blade. I grind my blades freehand using a belt grinder.

I will finish
grind the blade after heat treatment. I drill the holes for the pins that will
be used to attach the handles at this stage. After treating the steel would be
too hard to drill.

Here, I am
jumping ahead a little bit. At this stage the steel has been heat treated, the
blade has been finish ground and polished, and the I have added some decorative
filework along the spine. It is now time to make the guard and the handle.

I choose a
set of desert ironwood slabs for the handle and I cut the guard from a piece if
brass bar stock.

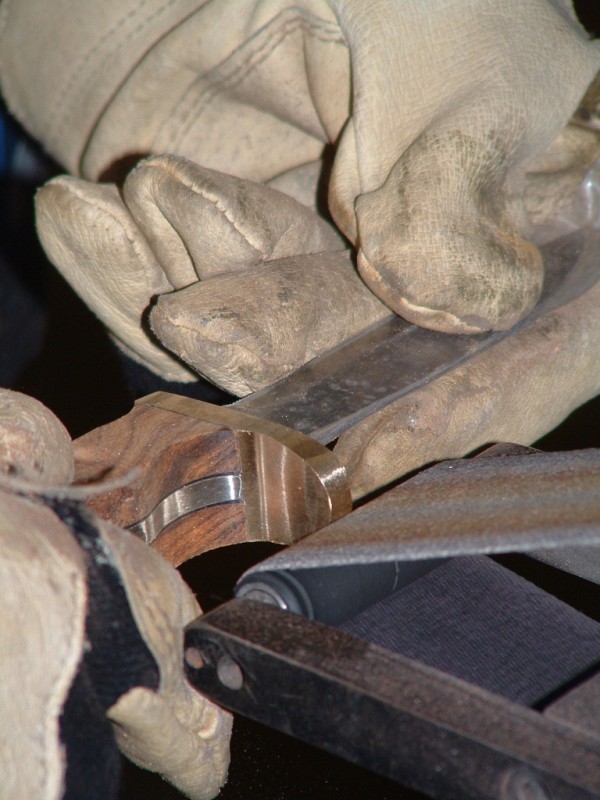
The guard is
fitted to the knife and the handle slabs are attached with pins and high
strength epoxy to insure that it is a watertight fit. In this case, I used some
black spacer material between the wood and the steel. Since the blade has been
polished at this point, I have covered it with tape to protect it from scratches
while I finish the knife.

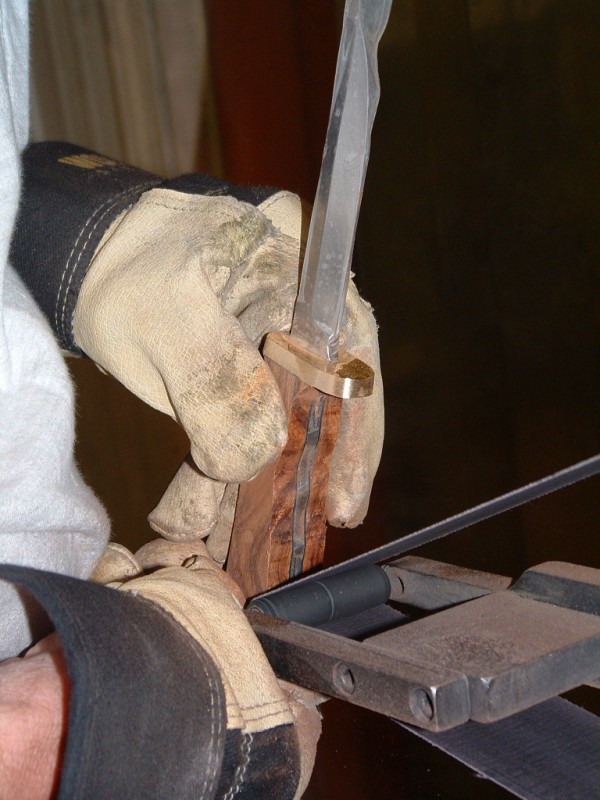
Here, the
handles and guard have been attached and I have cut away some of the excess wood
with a bandsaw.

Now I shape
the guard and handle using a belt grinder.
I check the
shape, feel and the balance of the knife.

After I do
some finish sanding by hand with fine grit sandpaper and emery cloth, it's time
to buff the handles and finish the knife. Buffing is by far the most
hazardous part of knifemaking. If I am not extremely careful, these buffers can
jerk the knife out of my hands and throw it back at me in the blink of an eye.

The finished
knife. In my opinion, you can't beat the beauty of ironwood handles. Ironwood is
a rare and extremely hard natural wood with beautiful grain patterns.

The knifemaking process varies somewhat depending on the type of knife I am making and the materials being used but this is an overview of what it takes to make a custom handmade knife.
As you can see, many hours of work go into even a small boot knife. It took a lot of practice to hone my freehand grinding skills and I cannot say enough about the expert guidance offered by mentor and friend Gil Hibben.
I would also like to thank my good friend Rhonda Hubbuch for taking many of the photos above.
If you would like to see how I make a fold-over sheath, CLICK HERE.
A tutorial on how to antique brass is HERE.